Showing posts with label Woodworking Projects. Show all posts

Tuesday, 29 November 2011

Using Omni-Gel to Transfer Images


I love transferring images onto wood, metal, terra cotta, towels, etc!  I think I've tried almost all of the ways out there!  

Here's another option that works especially well on tiles for coasters, metal cans and even wood!--Omni-Gel.  I purchased it at Michael's. 


Follow the directions on the bottle:

Print off an image using a laser printer (or make a laser copy at Kinko's) on white paper.  Use the regular image NOT the mirror image for this process.

Apply a smooth coat of Omni-Gel using a foam brush.  Go in one direction over the image and a good amount around the edges.

Let that dry, (it takes about 15 minutes) then go over everything in the opposite direction with another smooth coat.

Let that dry, then brush on a third coat diagonally. 
  
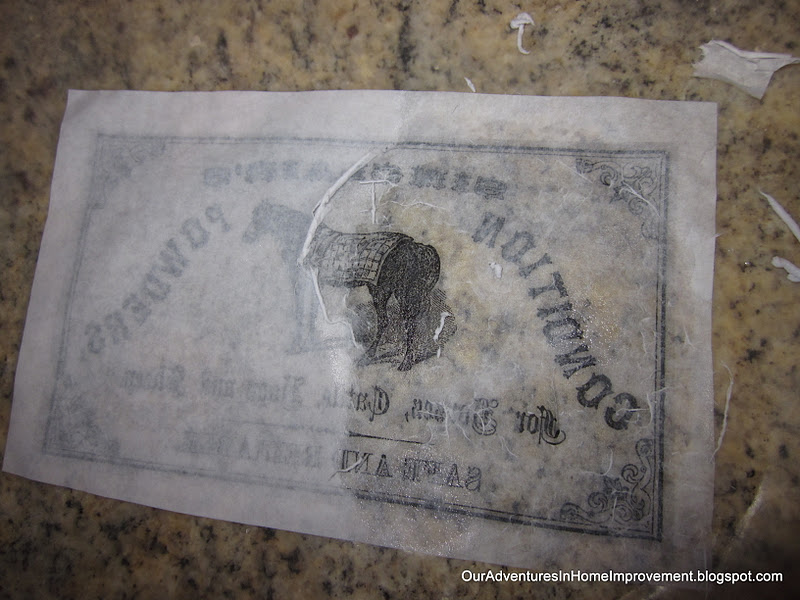
Graphics from The Graphics Fairy

After it's completely dry, set the paper in a bowl of water.  (I use a Dollar Store dish bucket)

 Let that sit in the water for about 15 minutes. (extra time in the water doesn't hurt)

 I put the wet image on a piece of wax paper or foil so it doesn't move much.

I used to use my finger in a swirling motion to remove the paper, then I started using a micro-fiber cloth.  It is SO much faster and easier!  You may need to spray it with water or dip it back in the bowl to keep the paper damp while you're removing it.


(Please excuse the different images here.  I was making a lot of things at once.)  :)   This graphic is also from The Graphics Fairy


You will want to get ALL of the paper off as it will look cloudy after you've finished your project (not good!)  if you've missed any.  Using the micro-fiber cloth really helped.  I let it dry a bit, then go back and add a little water to see if any additional paper comes up.


If I'm planning to adhere the image to wood or metal, I cut it to size at this point.  I cut right along the edge of the graphic for wood or metal projects.  If I'm going to use the image for coasters, I wait until I have applied it to the tile so it covers everything perfectly, then cut right at the edge of the tile.

Then apply a coat of Omni-Gel to the back of the image and set it on the can or wooden piece.  Smooth out all of the air bubbles and let it dry.


Here is an image applied to a wood box using the same technique.
Graphic from The Graphics Fairy


If you want to make fun coasters, start with a 4" tile.  I purchased mine for 38 cents each at Lowe's.


Apply self stick cork board to the back. I purchased a roll of it at Michael's.


 Use the above process using Omni-Gel.
 Graphic from Graphique on Etsy


 Apply the image onto the tile using the above process.  Set your scissors right on the edge of the tile and cut it.  It will be a little slippery as it's wet with Omni-Gel.  Rub the edges into the rough edges of the tile so they really won't show up.

When it's dry, sprinkle a little bit of salt on the tile and spray it with a clear sealant.  I've had the problem in the past with some tiles where wet glasses would stick to the tile.  It seems to work well to add the salt to solve this problem.

So now you've got several projects you can make with Omni-Gel transfers.  

Happy Crafting!

Pam

I am linking to the following parties:

Savvy Southern Style's Wow Us Wednesdays 


Photobucket The Graphics Fairy

Monday, 21 November 2011

Beachy Clock


My husband made some tops for the wine barrel tables that I posted about last week. You can see that post HERE.   As neat as the tops were, they just didn't look right on the bases.  I stained them the same, but because the wood was different in some way, it didn't stain the same color. 


I used Minwax Provincial, then sanded it all down a little.  I kept trying to match the barrels, but it wasn't going to work...


 So I used the wine barrels without the tops and set his project off to the side....


The other night it came to me that the top would make a neat clock.  I had purchased a lot of 3" starfish on ebay a couple of years ago and thought it would be fun to use them instead of  numbers on the clock.


My biggest problem was finding clock hands that were big enough.  I bought some at Michael's, but they were sooo tiny that you could hardly see them.  After searching online and finding some possibilities, but not being thrilled with paying $3 for the hands and $6 for shipping (and then waiting several days for them to arrive!), I remembered that I had some clocks I wasn't using, and luckily, one of them had hands that were pretty big.  


Because the wood was stained such a dark color, I needed light clock hands.  I spray painted them a sand color.


My husband routed out a spot in the back for the movement (so it wouldn't stick out from the wall too far) and attached hooks and a wire for easy hanging.  We did all of this before attaching the starfish to the front.


I then laid out the starfish around the edge.  The starfish are somewhat uniform in size, but some are flat and some aren't, some have all five "fingers" (legs?) the same size and some don't...  I just tried to evenly space them around the board and realized that they wouldn't be 100% perfect, but that was ok.


I used Tacky Glue to attach them.  I like it because it dries clear and doesn't burn the skin off of my fingers like a hot glue gun.  :)


We then attached the clock hands to the movement and hung it on the wall.  It was a really fun and easy project.  (The light spot that shows up in the pictures pointing to the "6" on the clockface doesn't show up like that in person.)  


Thanks for your visit!

Pam


I am linking to the following parties:


vif187
Chic on a Shoestring Decorating
Funky Junk's Saturday Nite Special http://www.thegrantlife.com/search/label/financial%20friday

Thursday, 27 October 2011

Transferring an Image onto Wood


I have tried several methods to transfer images from my favorite website, The Graphics Fairy, onto wood.  The Citrasolv method works well, I've tried Mod Podge and some others, but also wanted to try using the Woodworker's Transfer tool that I learned about from Dee at A Lapin Life.  I found the link on her site to buy this tool from Amazon. (It costs about $14 and qualifies for their free shipping if your total is over $25)  It was really easy to learn how to use it from the directions right on the package.


I started with a mirror image of a graphic from a laser copy.  (Remember that if you only have an inkjet printer, just take it to Kinko's or anywhere with a big copy machine, copy it and you'll have a laser copy)


I used a simple, small,  beaten up fence board from Lowe's.  I did sand it where I was going to apply the graphic, so it was pretty smooth in that area, but other than that, I left it in its beaten up state.  I taped the graphic to the wood so it would stay in place and rubbed the heated tool over the paper.  It took a couple of minutes of running the tool over the paper for the graphic to transfer onto the wood.   I lifted off the paper and the graphic looked great.


I stained the wood with Minwax Puritan Pine.  I like this color on cedar as it's kind of dark, but still shows the graphics.  Unfortunately, no one seems to carry this color anymore!


After the stain dried, my husband made the box.  


I found some fall bushes at Michael's.  I stuck them in pots with styrofoam, put some spanish moss on top and they were done.


I really love the way the wood transfer tool works!  Dee at  A Lapin Life  has a tutorial on using it to transfer graphics onto fabric as well.  I think that may be my next project!


Thanks so much for your visit!

vif187

Funky Junk Interiors The DIY Show Off The Graphics Fairy