Tuesday 30 August 2011

Don't Throw Your Old Pillow Cases Away! Another Easy Pillow Project.

 
We recently bought a new bed that was a different size than our old one.  I was getting all of the old sheets together to give away when I found a set in the back of the linen closet that was made of cotton and cream colored.  Hmmm, I am always on the lookout for fabrics to make pillows with and love that a pillow case has a tight weave to take an iron on transfer really well.


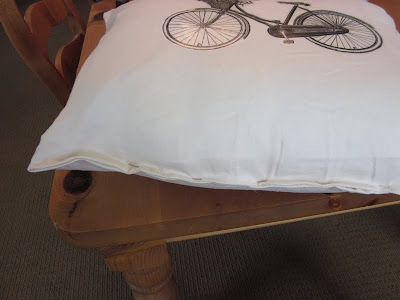
I started by ironing the end of the pillow case really well.  (yes, the picture above is before I ironed it!)  :)  I then put a board inside of the pillow case so both sides weren't touching.
 

I printed off this cute bike graphic that I purchased for $1 from Graphique on etsy.com.


**** Please note that if you are trying to transfer a graphic with writing on it, be sure to FLIP the image in Picnik or other program before copying it.  (In Picnik, it's in the ROTATE tab).

I used my trusty Jolee's Easy Image Transfer sheets (purchased at Michael's)  and my inkjet printer. 


I cut pretty close to the image so there wasn't a lot of white edging showing.  I ironed it on and let it cool completely before peeling off the backing.


I used an Ikea pillow insert (the long, skinny one that's about 20"x14") that I had on hand.  I think the inserts are about $6 at Ikea.


I cut the open edge of the pillowcase to the size of the pillow insert and only had to sew one side.  


And here's the finished project:


This was such an easy project and cost me almost nothing!

I am excited to use the other pillow cases and the fabric from the sheets to make some more things.


Thanks so much for coming by!

Pam


 I am linking up to the following parties:

 
 French Country Cottage's Feathered Nest Friday
Savvy Southern Style's Wow Us Wednesday
You Are Talking Too Much's First Link Party
My Romantic Home's Show & Tell Friday
Unexpected Elegance's Transfer Link Party


vif187

Saturday 27 August 2011

Keep These Drop Cloths Off the Floor


I've seen so many great projects in blogland using drop cloths.  I found this one at Lowe's.  I think I paid $6 for it. 


I had my sewing machine out today and thought I'd try to make something.  Let me tell you, my sewing skills are very, very basic!  My 7th grade Home Ec teacher probably wouldn't be too happy, but really, all I am good at with the sewing machine is sewing simple straight lines!  

I cut out a piece of fabric and made sure I kept the side with the finished edge.  I used this for the top.  


I folded it in half, turned it wrong side out and sewed the bottom and side.  When I finished it, it was way too long for a bottle, so I sewed another seam about 5" up and cut it off there.  It fit the bottle nicely.  (of course I could've measured first to make it easier...)  :)

I added a piece of ribbon and it was done!  What an inexpensive and simple project. 


Here's another project I made.

I sewed three sides of the fabric and left the top alone.  On this one, I did not use the part of the fabric with the finished edge.


I then used a stencil and black craft paint.


Be sure to put foil or something between the layers of the fabric so the paint doesn't bleed through to the back.


 Spray it with a clear sealer and it's good to go.

I'm not sure how long it'll last outside, but I'm going to enjoy while it does.

I used less than half of the drop cloth to make both projects.


Thanks for visiting!

Pam

I am linking to the following parties:


Tuesday 23 August 2011

Cute Little Topiaries


I love topiaries and had almost everything on hand to make some.  I have seen lots of blog posts on making them, so decided to try them myself.  It was a fun project.

I used the following materials:

  • terracotta pots

  • 2 1/2" styrofoam balls

  • 5/16" dowel

  • small block of styrofoam

  • bag of soft moss

  • bag of green moss

  • white paint

  • brown antique paint

  • glue gun and lots of glue sticks

  • foam brush


I started by painting the pots lightly with white paint,  then wiped some off using a damp paper towel.  I then applied some of the brown antique paint on very lightly.


I painted the dowels with the brown antique paint. I cut them to about 7".   I stuck the dowel into the center of the foam ball.  I added some hot glue in the hole to hold it.


I used the glue gun to apply hot glue in sections over the styrofoam ball.  I put the soft moss on it, using my hand to make sure it stuck.  (and tried to keep from burning the heck out of my hand)  :)  Once I got all of the moss on, I trimmed it a bit to make it into a ball shape.


I cut up pieces of the block of styrofoam and stuck it in the pot as tightly as I could. (This picture doesn't show the styrofoam wedged in the bottom of the pot, but it should)   I drizzled lots of hot glue in there to hold everything in place.  I then stuck the bottom of the dowel into the center.  


 I applied more glue, then stuck the green moss on top.


And here is the finished product.  I'm very happy with the way they turned out.  It was a messy project, but so satisfying!


Thanks so much for visiting and following my blog!


Saturday 20 August 2011

Pretty Bird Nest Napkins
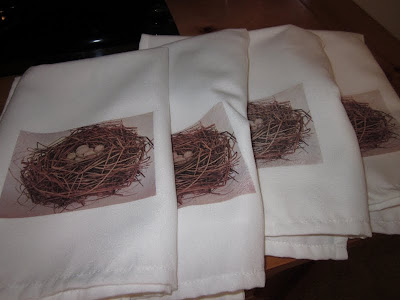


I love decorating with birds, nests, birdhouses, birdcages, etc., so I was thrilled when I found this image.


When I found plain white cotton napkins, I knew just what to do with them.


  I used my ink jet printer and Lesley Riley's TAP Transfer Artist Paper.  


I cut the image out so there wasn't any white showing around it.


 I ironed it on the back side as instructed.  (It took less than a minute to do this step).


 Here's the finished product.


I am excited to use these for my next dinner party. 


I've had a few questions about how washing affects the graphics.  I've never had any problems and the graphics still look great!

Thank you for visiting!


Pam


I am linking to the following parties:


UndertheTableandDreaming The DIY Show Off

My Uncommon Slice of Suburbia's Tuesday Treasures